Phycial Computing Final Project: Part Three
Connecting the Camera and Finalising the Project!
Introduction...
This is the final blog in the mood light project and it will cover how to connect the camera to the Raspberry Pi, how to take pictures with it and upload them to the API, and will also incorperate a button so that a picture can be taken on demand! At the end of this blog you should have a working mood light just like mine that can actually be used in and around the house!
Components Needed...
- Raspberry Pi with Rasbian installed.
- Breadboard.
- Raspberry Pi Camera Module.
- Push Button (2 or 4 Pin).
- Circuit from the Previous Blog.
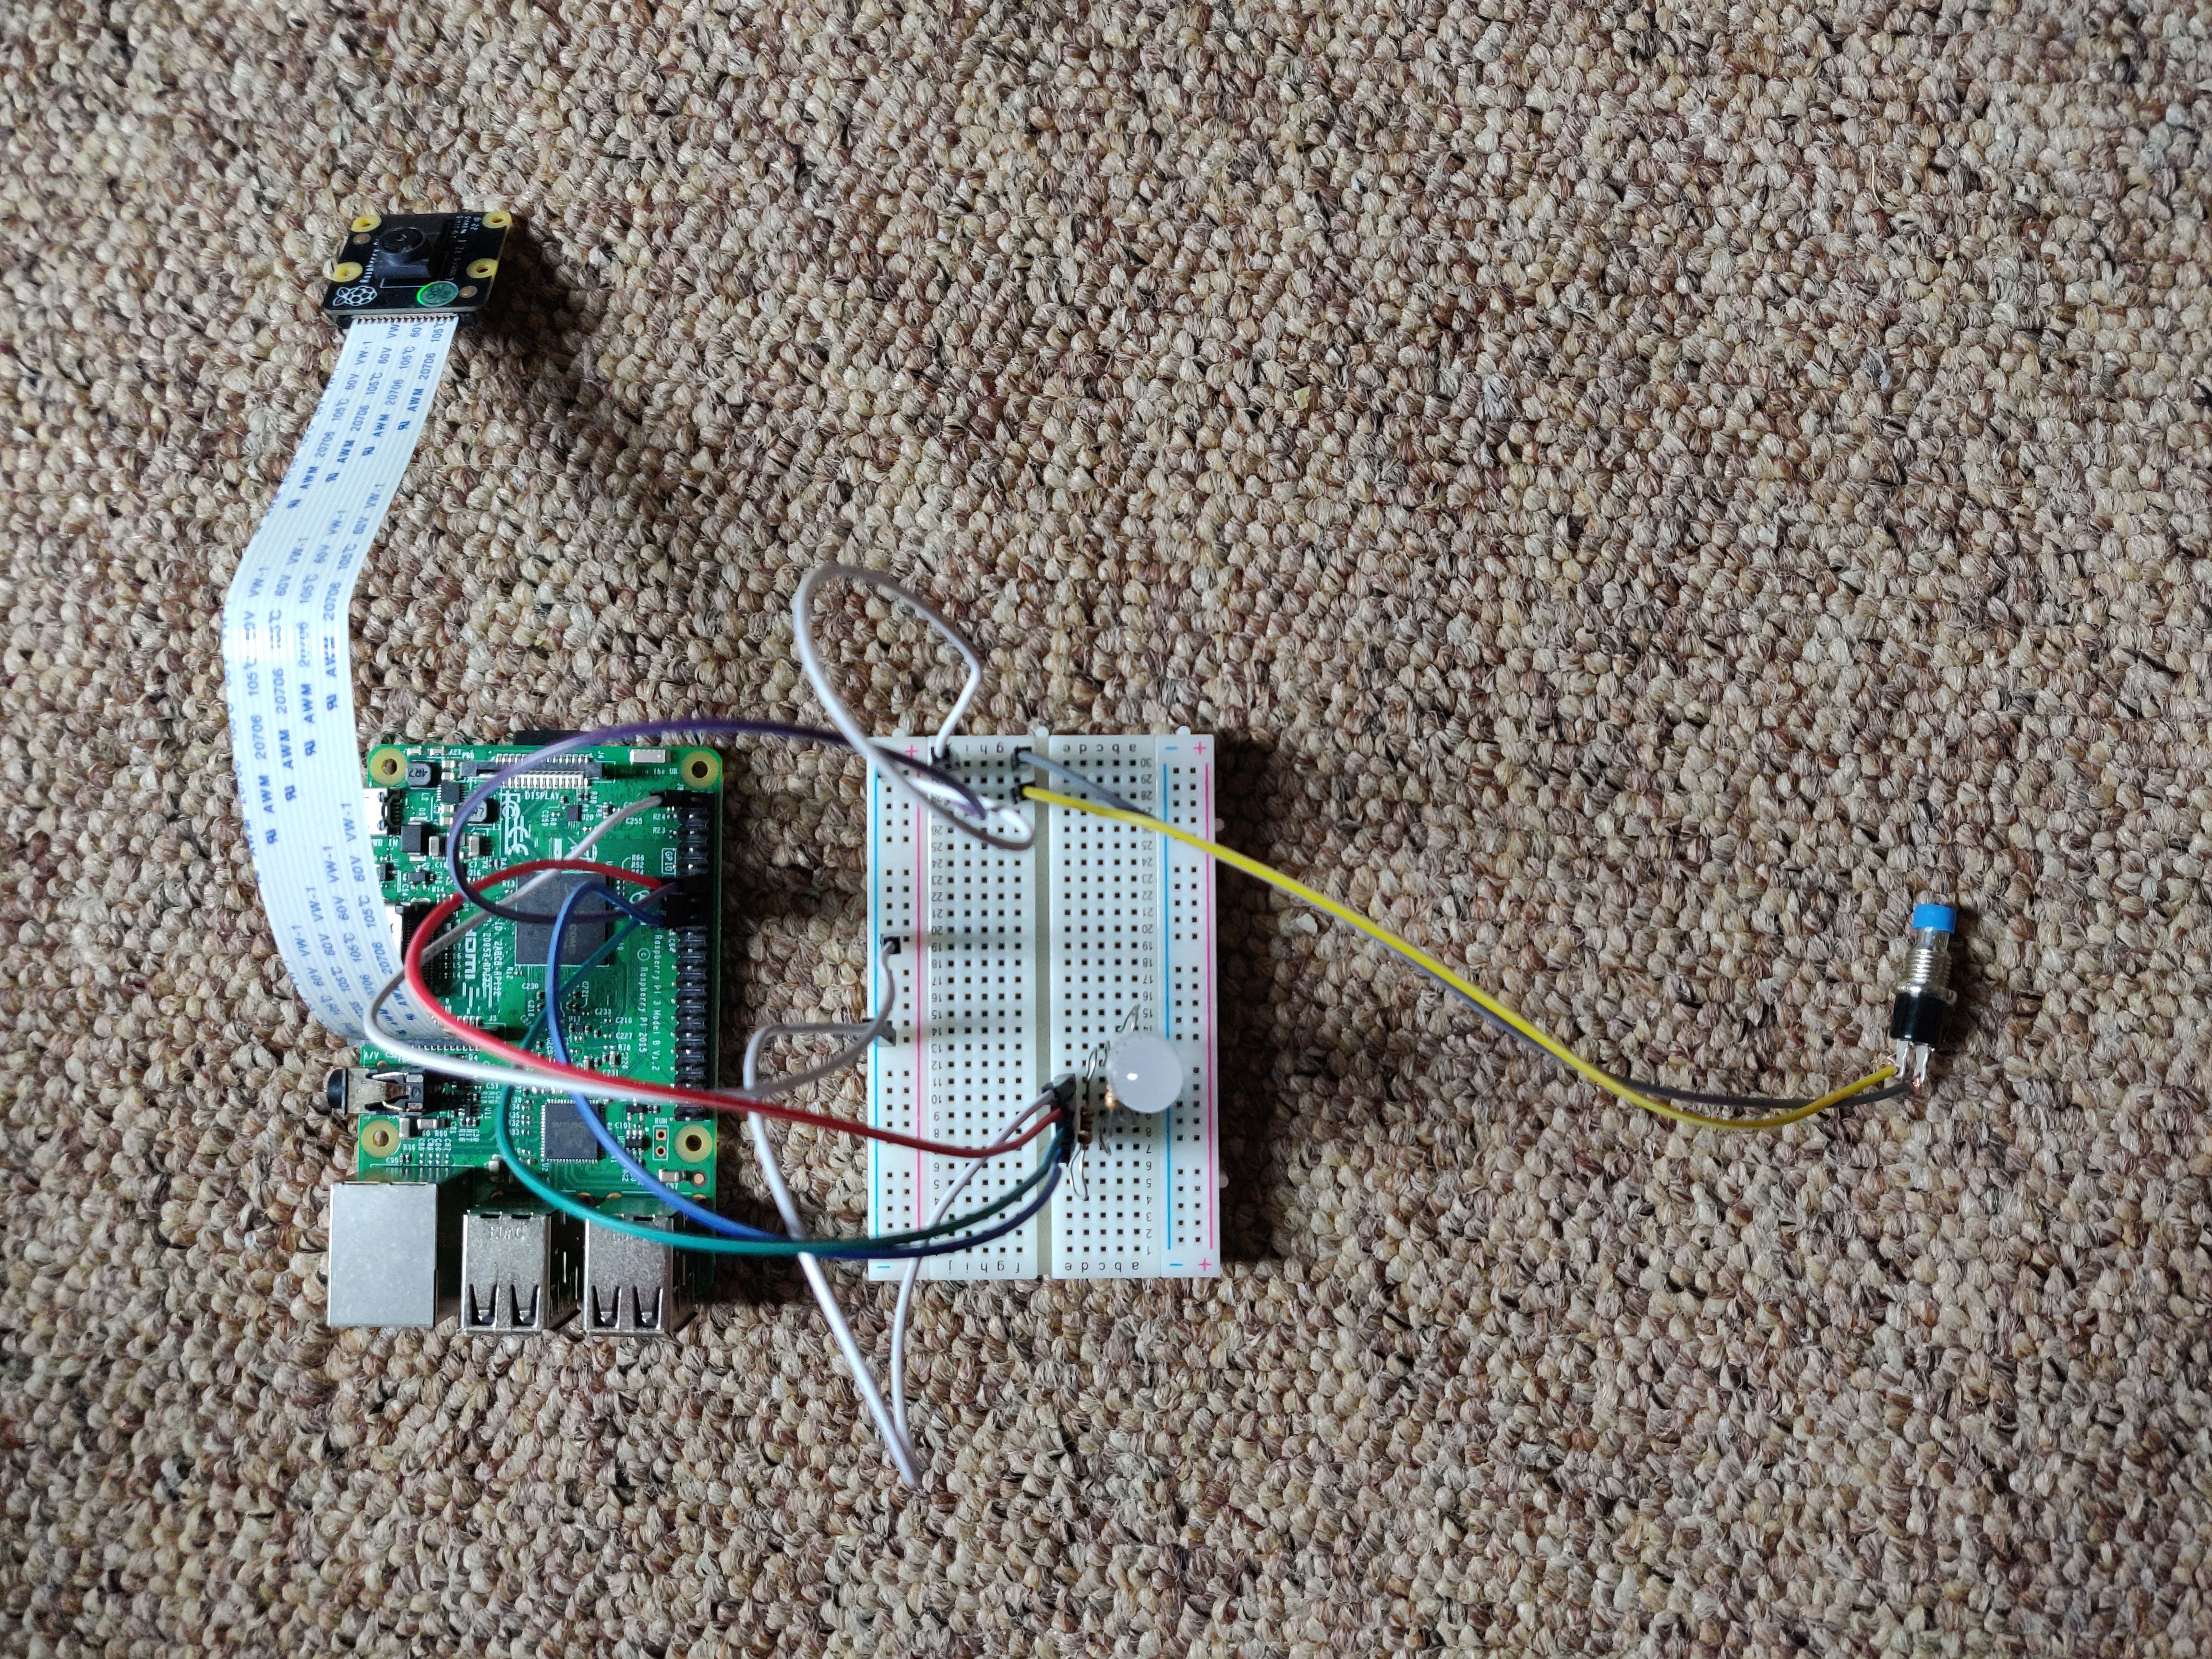
Connecting the Camera...
The process of connecting the camera module to the Raspberry Pi could not be simpler as it is pretty much plug and play! The only hiccup I had was the actual plugging in of the module as it can be quite fiddly. All that needs to be done is to raise the plastic clip of the camera socket, slide the ribbon in, and then push the clip back down. The final step is to go to the preferences with the Raspberry Pi menu, click interfaces, and ensure the camera is turned on. You are now ready to use the camera!
Taking Pictures with the Camera with Python...
Like with many aspects we have covered so far, the combination of the Rapberry Pi and Python make it very easy to interact with hardware with code. The camera is no exception to this, and just a few lines are needed in order to achieve this! We will be using the camera to take pictures of faces, which will then be uploaded to the API in real time! The first step we need to do is import the camera library named PiCamera which will allow us to interact with it from within Python. Next, we create a camera 'object' by calling the PiCamera() method from the PiCamera library. We start the feed from the camera with the 'start_preview()' function and add a delay for a couple of seconds, I have opted for five seconds. The reason for doing this is to give the camera modules sensors time to adjust to the lighting and take the clearest picture possible, which is vital to get accurate feature recognition from the API. Finally, the '.capture()' function is used to actually take a picture, and within the brackets you can specify the name of the file or path of the file to be saved. Then, we stop the camera stream with the 'stop_preview()' function to clear everything up! You will now have access to the camera module and be able to take pictures with it!
                        # Import camera and time library.
                        from picamera import PiCamera.
                        import time

                        # Instantiate camera object.
                        camera = PiCamera()

                        # Start camera preview, delay, take picture, and stop camera preview.
                        camera.start_preview()
                        time.sleep(5)
                        # Save captured image to images folder in directory with name 'capture'.
                        camera.capture('images/capture.jpg')
                        camera.stop_preview()
Connecting the Camera Script to the API and LED Script...
The next step to take, and one of the final steps in completing this project, is to connect the camera to the API and LED script we created in the previous blogs so we can analyse pictures we have taken with the API immediately! Whether it be pictures of your own face, family members, or friends, it suddenly becomes a lot more exciting when you are able to take your own pictures and see the effects in action! The first change I made to the script from the previous week was to clean it up a bit and add some seperate functions. I put the section of code that calls the API into its own function called 'get_emotion()' and upon importing the camera code, I put that in its own seperate function called 'capture_image()'. There were a number of reasons for doing this, the first being to simply reduce my confusion when coming back to it at a later date and making changes. As the code is getting fairly long, it is much easier to read when the seperate aspects have their own sections. Also, seperating the picture taking and the API call just makes logical sense and means we can call each function in order to reduce the chance of errors occuring! There was one change to make with the API call itself and this was the 'image_path' variable. This path has to match what was specified in the 'capture()' function from the camera script. In my case I would simply change it to the full path (emphasis on FULL) of where the 'images/capture.jpg' folder/file is located on the Pi. Another change is the moving of the 'strongest_emotion' and 'largest_number' variables to inside the 'get_emotion()' function. In order to access the 'strongest_emotion' variable outside this function, we use the keyword 'global' before it. Those are all the changes that need to be made! At the bottom of the script, we can then call the 'capture_image()' function first, then the 'get_emotion()' function. Then we have a number of if/else statements to check the returned emotion and a call to our LED script to change the colour based on that!
                        # Import requests library, camera library, and our LED functions.
                        from picamera import PiCamera
                        import requests, time
                        import light_control as emotion

                        # Instantiate camera object.
                        camera = PiCamera()

                        # Define capture_image function
                        def capture_image():
                            camera.start_preview()
                            time.sleep(5)
                            camera.capture('images/capture.jpg')
                            camera.stop_preview()

                        # Define get_emotion function.
                        def get_emotion():
                            # Declaring global strongest_emotion variable so we can access it outside this function
                            global strongest_emotion

                            # Specify var for largest number.
                            largest_number = 0


                            # Specify your subscription key here.
                            subscription_key = None
                            assert subscription_key

                            # The endpoint from where you are getting the API key.
                            # This is specified on overview page on the Azure dashboard.
                            face_api_url = 'https://westcentralus.api.cognitive.microsoft.com/face/v1.0/detect'

                            # Specify the full path to your local image that was captured from camera.
                            image_path = ''

                            # Open the image and store the data in a variable.
                            with open(image_path, 'rb') as f:
                                image_data = f.read()

                            # Set headers.
                            headers = { 'Ocp-Apim-Subscription-Key': subscription_key }

                            # Set params, i.e. what do you want to be returned. In this case we just want the emotion confidence levels.
                            params = {
                                'returnFaceAttributes': 'emotion',
                            }

                            # Calling the API with what is defined above and storing the response.
                            response = requests.post(face_api_url, params=params, headers=headers, data=image_data)
                            # Converting the reponse to a JSON dict.
                            response = reponse.json()
                            # Setting the response to the face attributes part of the dict.
                            response = reponse[0]['faceAttributes']

                            # Loop through the emotions returned and check the confidence level.
                            # The emotion that corresponds to the highest confidence level will be set to the strongest_emotion variable.
                            for k in reponse:
                                if reponse[k] > largest_number:
                                    strongest_emotion = k

                        if __name__ == '__main__':
                            # Capture image then upload to API. Then check the returned emotion!
                            capture_image()
                            get_emotion()
                            if strongest_emotion == 'anger':
                                emotion.anger()
                                time.sleep(5)
                            elif strongest_emotion == 'anger':
                                emotion.anger()
                                time.sleep(5)
                            elif strongest_emotion == 'contempt':
                                emotion.contempt()
                                time.sleep(5)
                            elif strongest_emotion == 'disgust':
                                emotion.disgust()
                                time.sleep(5)
                            elif strongest_emotion == 'fear':
                                emotion.fear()
                                time.sleep(5)
                            elif strongest_emotion == 'happiness':
                                emotion.happiness()
                                time.sleep(5)
                            elif strongest_emotion == 'neutral':
                                emotion.neutral()
                                time.sleep(5)
                            elif strongest_emotion == 'sadness':
                                emotion.sadness()
                                time.sleep(5)
                            elif strongest_emotion == 'surprise':
                                emotion.surprise()
                                time.sleep(5)
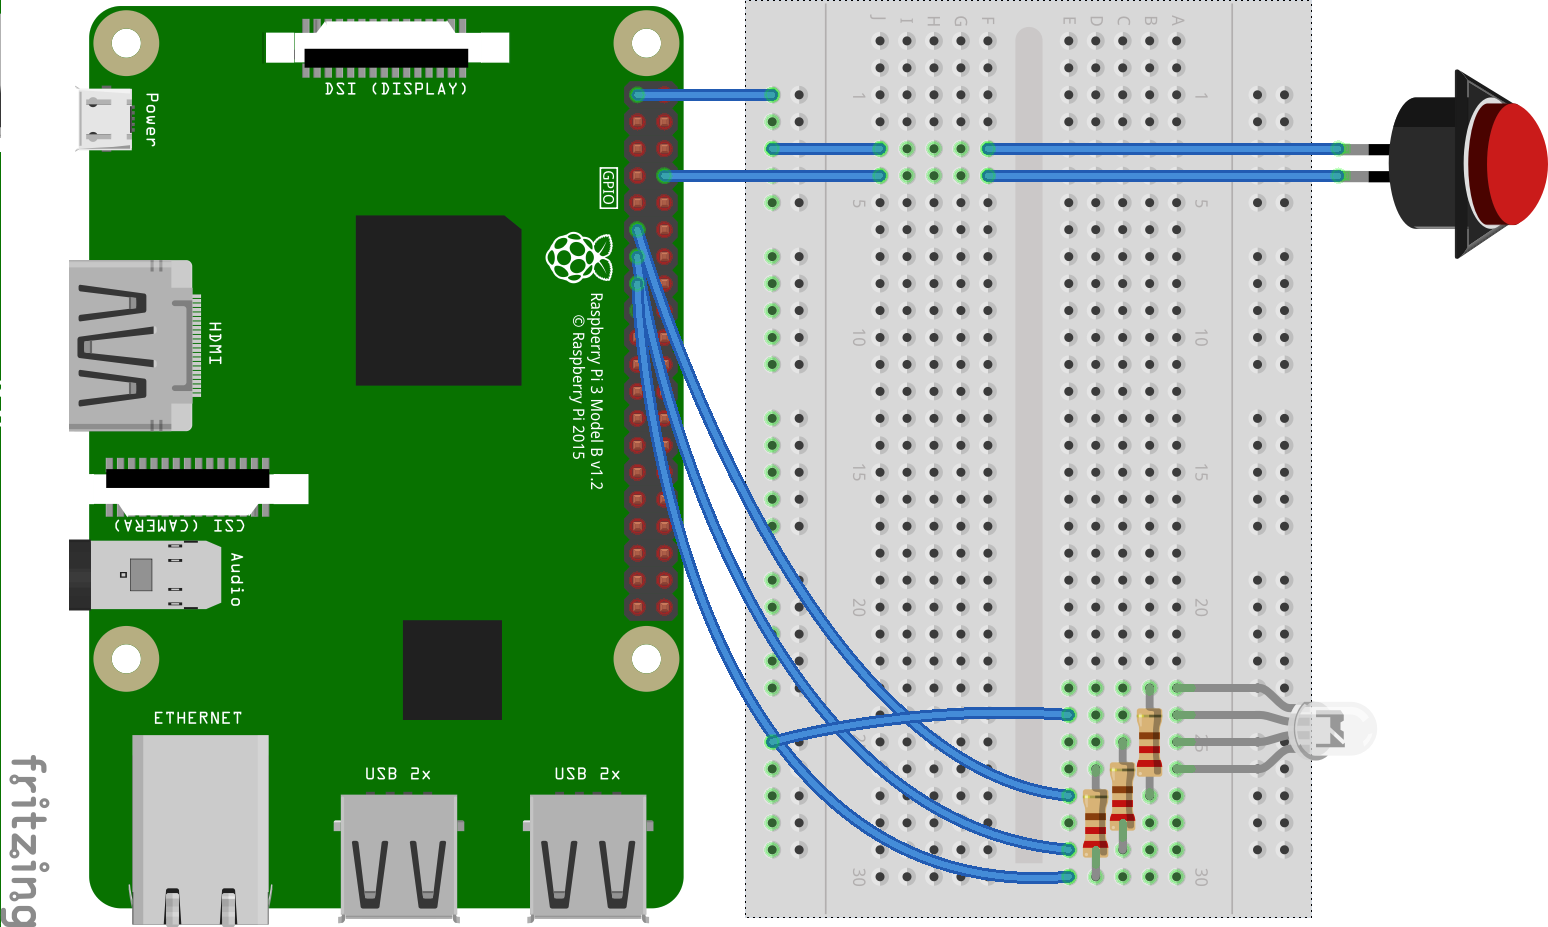
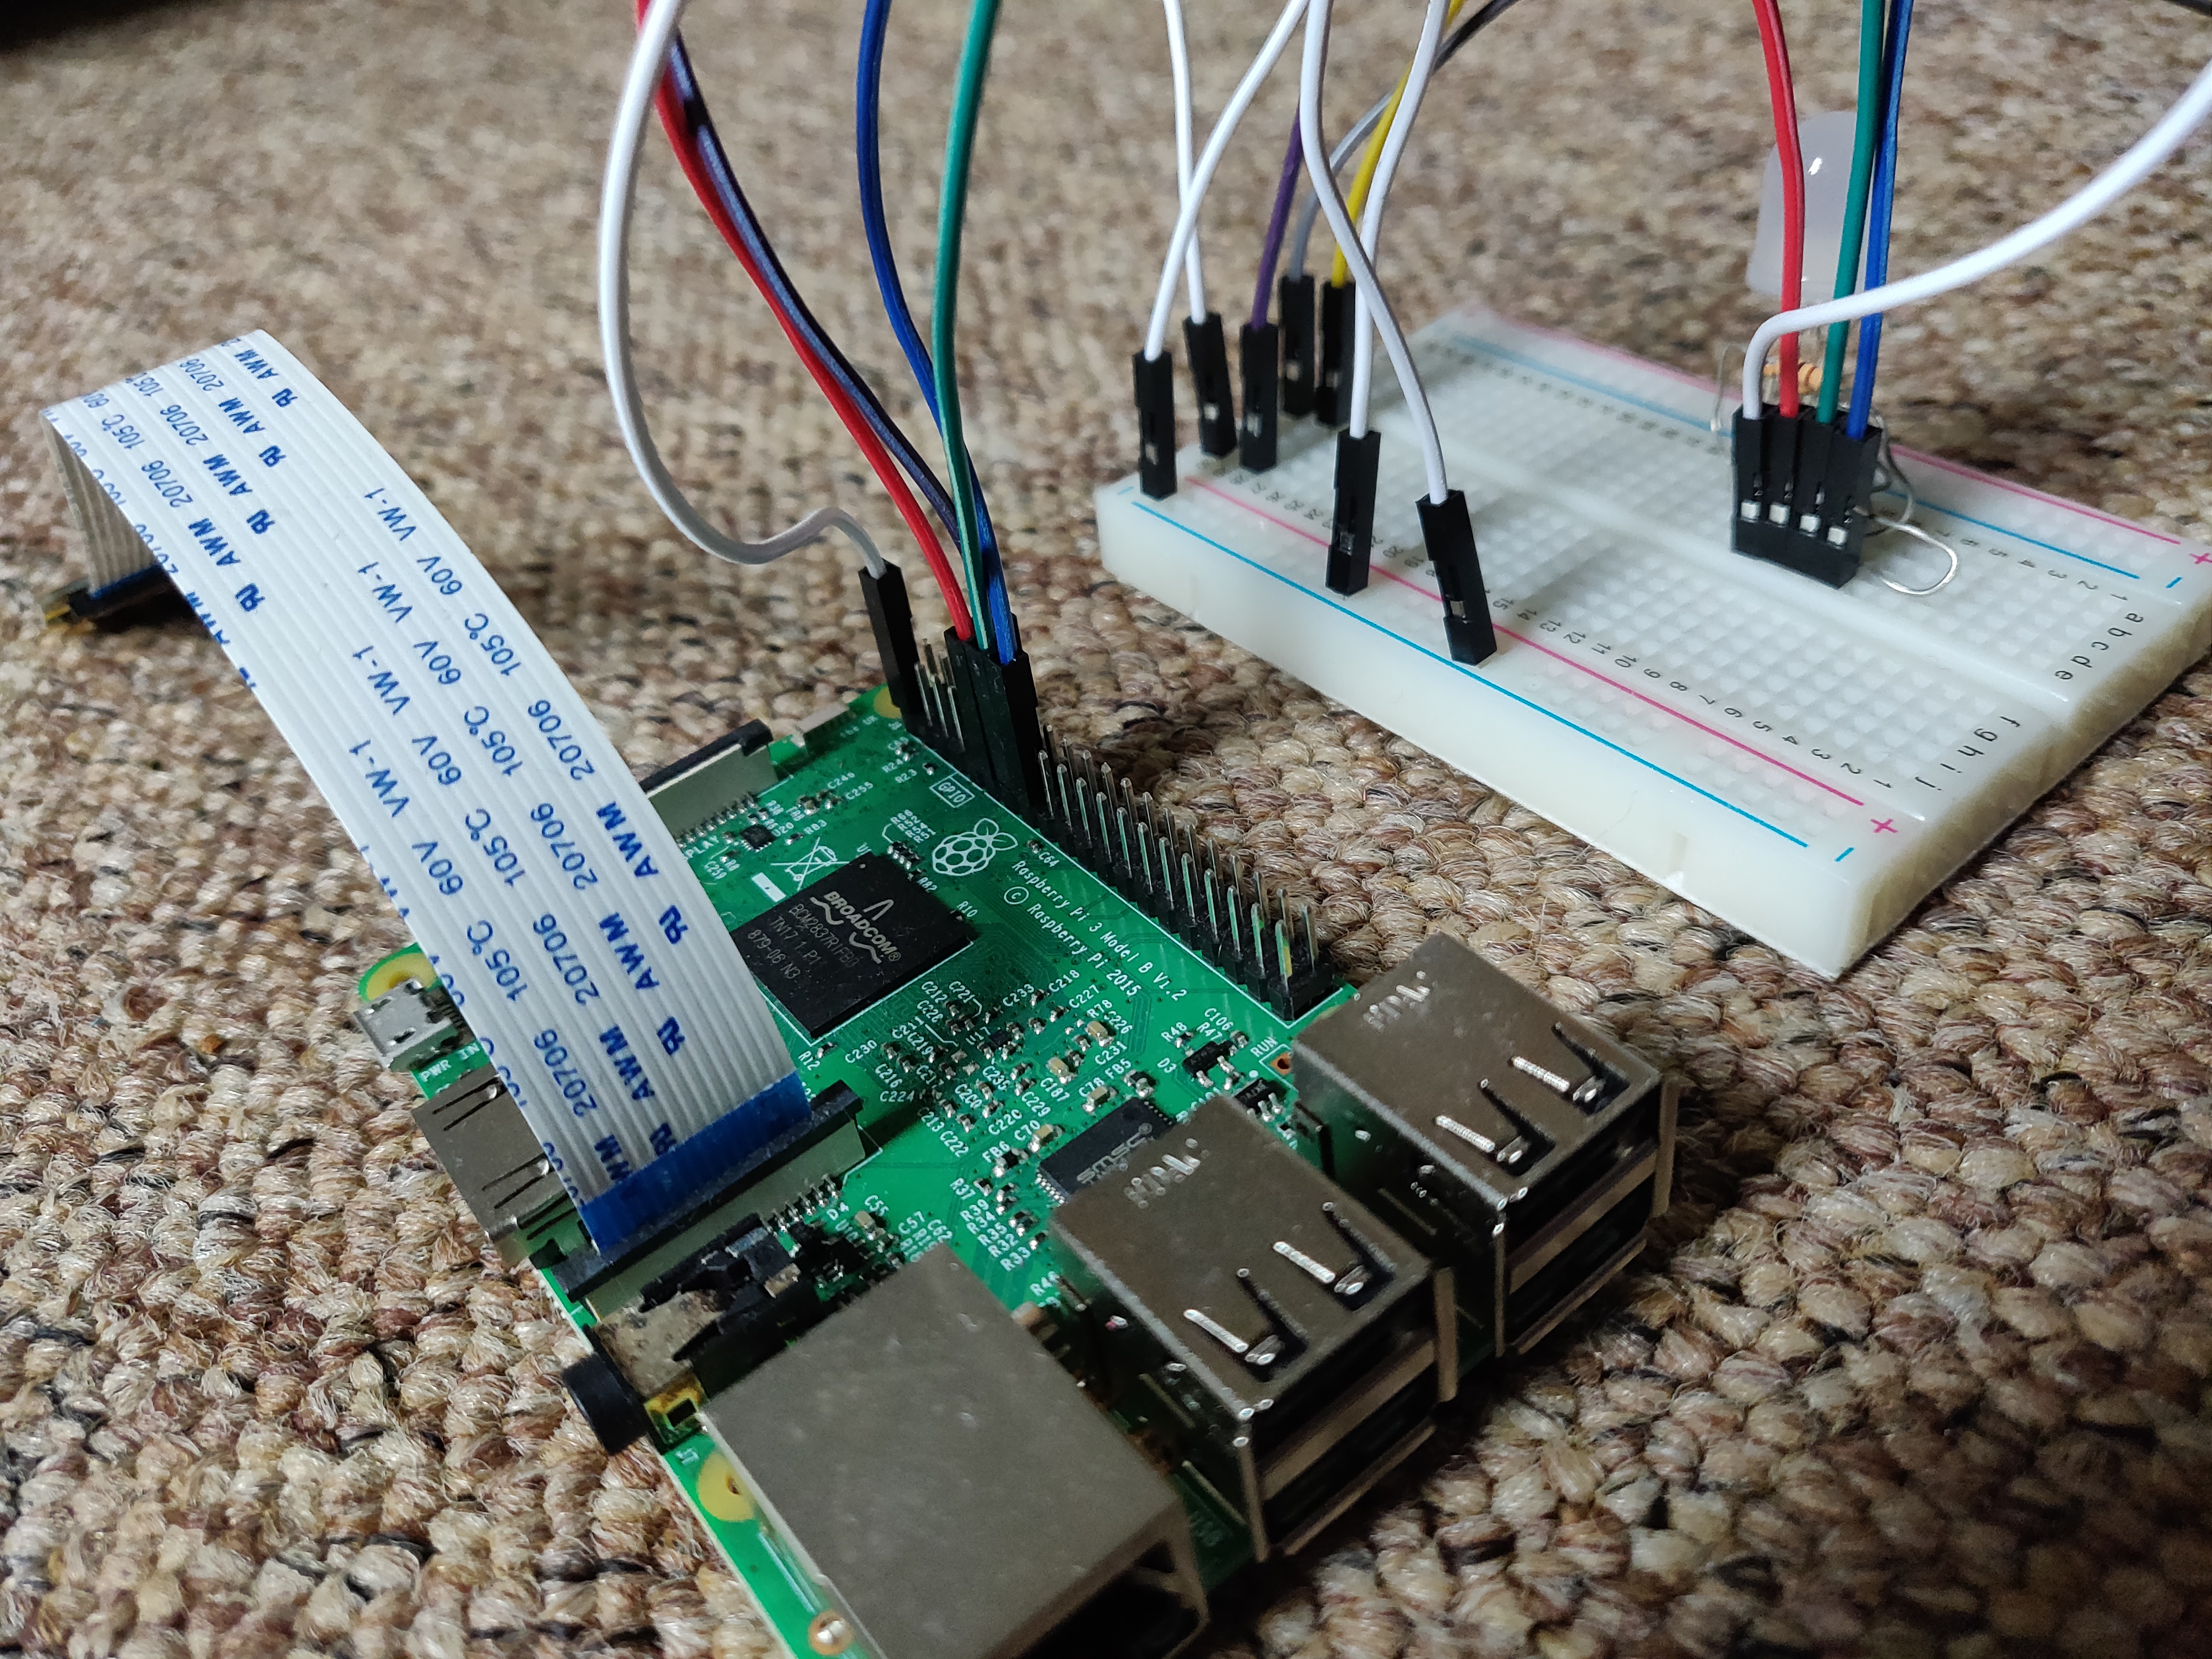
Adding a Button to Call the Functions...
The final addition I would like to make to this project is the addition of a button. This can quite easily be added to our current circuit without to much moving around and also requires very little code to be added. I have a diagram below to show the changes to the circuit and where the button can be plugged in. This will work with either a two or four pin push button. It just so happens that I am using a two pin one because that was cheapest! However, the four pin ones are the more commonly used of the two, especially with breadboards as no wires-stripping or soldering is involved. To connect this two pin variety, I took two male to male jumper wires and cut one end off each, I then stripped the end of the wires and then wrapped the exposed end around each of the connectors. The other end can then be plugged into the breadboard as usual! To connect the button to the pi, one of the button connections was connected to the 3.3v pin, and the other was connected to one of the GPIO pins on the Pi; in this case I was using GPIO pin 12.
In regards to the code, we first have to set up the pin connected to the button as input instead of output, which is what we have usually been doing! All we do is use the 'GPIO.setup()' function and inside the brackets put the pin number, specify it is an input device with GPIO.IN, and finally set the current status for the button which is off with the command; 'pull_up_down=GPIO.PUD_DOWN'. The button is now connected and all we have to do is check for input. This is done with a very simple if statement as shown below!
                        # Import GPIO library.
                        import Rpi.GPIO as GPIO

                        # Set mode to board.
                        GPIO.setmode(GPIO.BOARD)
                        # Specify pin number and state it is an input device. Also state its current status.
                        GPIO.setup(12, GPIO.IN, pull_up_down=GPIO.PUD_DOWN)

                        # If the input is 'HIGH' i.e. button is pressed, execute print statement.
                        if GPIO.input(12) == GPIO.HIGH:
                            print('Button Pressed!')
The next step is to add this to our full script above! The import statement needs to be added as we are not currently using that in our main script, however the 'GPIO.setmode()' function can be removed as we are already specifying this in our LED script, which will be called before we are checking the status of the button. The 'setup()' function can go at the top of the script where we are initialising our other variables. To finish off the script, we can create a while loop. This will have the added effect of both being able to constantly check whether the button is being pressed and also allow us to keep the light on indefinitely until power is removed! This means we can remove the delays from the if/else statements. I also add the 'light_off()' command to initally set the LED to be off so it is not bright white upon the script being on!
                        # Import requests library, camera library, and our LED functions.
                        from picamera import PiCamera
                        import requests, time
                        import light_control as emotion

                        # Instantiate camera object.
                        camera = PiCamera()

                        # Define capture_image function
                        def capture_image():
                            camera.start_preview()
                            time.sleep(5)
                            camera.capture('images/capture.jpg')
                            camera.stop_preview()

                        # Define get_emotion function.
                        def get_emotion():
                            # Declaring global strongest_emotion variable so we can access it outside this function
                            global strongest_emotion

                            # Specify var for largest number.
                            largest_number = 0

                            # Specify your subscription key here.
                            subscription_key = None
                            assert subscription_key

                            # The endpoint from where you are getting the API key.
                            # This is specified on overview page on the Azure dashboard.
                            face_api_url = 'https://westcentralus.api.cognitive.microsoft.com/face/v1.0/detect'

                            # Specify the full path to your local image that was captured from camera.
                            image_path = ''

                            # Open the image and store the data in a variable.
                            with open(image_path, 'rb') as f:
                                image_data = f.read()

                            # Set headers.
                            headers = { 'Ocp-Apim-Subscription-Key': subscription_key }

                            # Set params, i.e. what do you want to be returned. In this case we just want the emotion confidence levels.
                            params = {
                                'returnFaceAttributes': 'emotion',
                            }

                            # Calling the API with what is defined above and storing the response.
                            response = requests.post(face_api_url, params=params, headers=headers, data=image_data)
                            # Converting the reponse to a JSON dict.
                            response = reponse.json()
                            # Setting the response to the face attributes part of the dict.
                            response = reponse[0]['faceAttributes']

                            # Loop through the emotions returned and check the confidence level.
                            # The emotion that corresponds to the highest confidence level will be set to the strongest_emotion variable.
                            for k in reponse:
                                if reponse[k] > largest_number:
                                    strongest_emotion = k

                        if __name__ == '__main__':
                            emotion.light_off()
                            while True:
                                # If button is pressed, capture image, get emotion, and then check returned emotion!
                                if GPIO.input(12) == GPIO.HIGH:
                                    capture_image()
                                    get_emotion()
                                    capture_image()
                                    get_emotion()
                                    print(strongest_emotion)
                                    if strongest_emotion == 'anger':
                                        emotion.anger()
                                    elif strongest_emotion == 'anger':
                                        emotion.anger()
                                    elif strongest_emotion == 'contempt':
                                        emotion.contempt()
                                    elif strongest_emotion == 'disgust':
                                        emotion.disgust()
                                    elif strongest_emotion == 'fear':
                                        emotion.fear()
                                    elif strongest_emotion == 'happiness':
                                        emotion.happiness()
                                    elif strongest_emotion == 'neutral':
                                        emotion.neutral()
                                    elif strongest_emotion == 'sadness':
                                        emotion.sadness()
                                    elif strongest_emotion == 'surprise':
                                        emotion.surprise()
Finishing Touches and Conclusion...
Both the circuit and the code for the mood light are now finished! However, the circuit itself isn't really very aesthetically pleasing and doesn't really fit well in a home environment. To take this project further I would suggest building a box for it and also adding some simple error handling to the script to ensure it doesn't crash. I created a simple container for my mood light just out of cardboard, as shown below! This isn't the greatest looking design, but it is all my budget and DIY skills would allow! I would also like to add a sort of lamp shade so the LED itself isnt exposed. However, I could not find an appropriate material to construct this with, a frosted platic or light glass would have been ideal, however I did not know where to obtain such a thing! I hope you have been able to follow this three part blog successfully, the full code will be available on my GitHub which is linked in the footer of this website. This third part of the project also concludes the Arduino experiments I have been creating! I have learnt a great deal over the last couple of months, both interms of hardware and software. It has also given me the inspiration to carry on experimenting with physical computing and it is definitely something I can see myself regularly toying around with for the forseeable future!