Phycial Computing Final Project: Part One
Introducing the Project and the Microsoft Azure Api!
Introduction...
To conclude this series of experiments with Arduino and physical computing I will be creating a final project that consolidates what I have learnt throughout this process. I will be building off the experiments I completed in the second week with the RGB LED, but I will also be introducing some new components and employing the use of an API. As a result of this, I need something with a bit more computational power that the Arduino, which is why I have opted to use a Raspberry Pi as the base for this project. In regards to the project itself, I will be creating a mood light of sorts that changes colour based on the users emotion. In order to capture the emotion, a camera will be used to take a picture of the users face. This picture will then be uploaded to the microsoft cognitive services API which is able to estimate a person's emotion purely based on their facial expression. The result of this will be evaluated and based on what is returned, the RGB LED will change colour! This first blog will act as an introduction to the project and will introduce the Microsoft cognitive services API and how to use it, and will also introduce the Raspberry Pi and how to get started with that!
Components Needed...
- Computer/Laptop with Python Insalled.
- A Microsoft Account.
Microsoft Azure API and Facial Recognition...
The Microsoft Cognitive Services, nicknamed Azure, are a set of APIs, SDKs, and services that were created to assist developers and hobbyists in developing intelligent and ‘smart’ application without having their own extensive knowledge or implementations of artificial intelligence or data science. The APIs they provide include vision, speech, language, search, and decision making. The API I am interested in for the purposes of this project is the vision API, a subset of which is the face API which provides access to algorithms that can detect faces and facial features. The implementation of face detection Microsoft have will, upon receiving an image of a person or multiple people, return attributes such as emotion, gender, pose, smile, whether they have facial hair, whether they are wearing glasses, and numerous other characteristics.
As mentioned previously, I am interested in finding out a persons emotion based on a picture of their face. In regards to the emotions supported my the Azure API there is anger, contempt, disgust, fear, happiness, neutral, sadness, and surprise. When a picture is uploaded to the API, a JSON dictionary will be returned which will list of each of these emotions along with a confidence level between 0 and 1, 0 being not confident at all and 1 being extremely confident. If you visit the facial recognition page here you can see the face detection API in action. The example image they have of the smiling lady has returned a confidence value of 1 for happiness with the other emotions having a value of 0. This means that the API is very confident that he lady in the picture is happy! You can try it yourself by submitting a direct image URL or also uploading your own picture! Microsoft have also provided extensive documentation on how to connect to this API with your own programs in a variety of different programming languages. For the purposes of this project I will be using Python. This decision has been made for a number of reasons. The main reason is that Python is very easy to get started with, especially in the realm of physical computing. The Raspberry Pi itself has output pins which are very similar to those found on the arduino, and within Python, we can connect to and send signals to these pins very easily, something which is more convoluted in other languages.
Getting Started with an Azure Account...
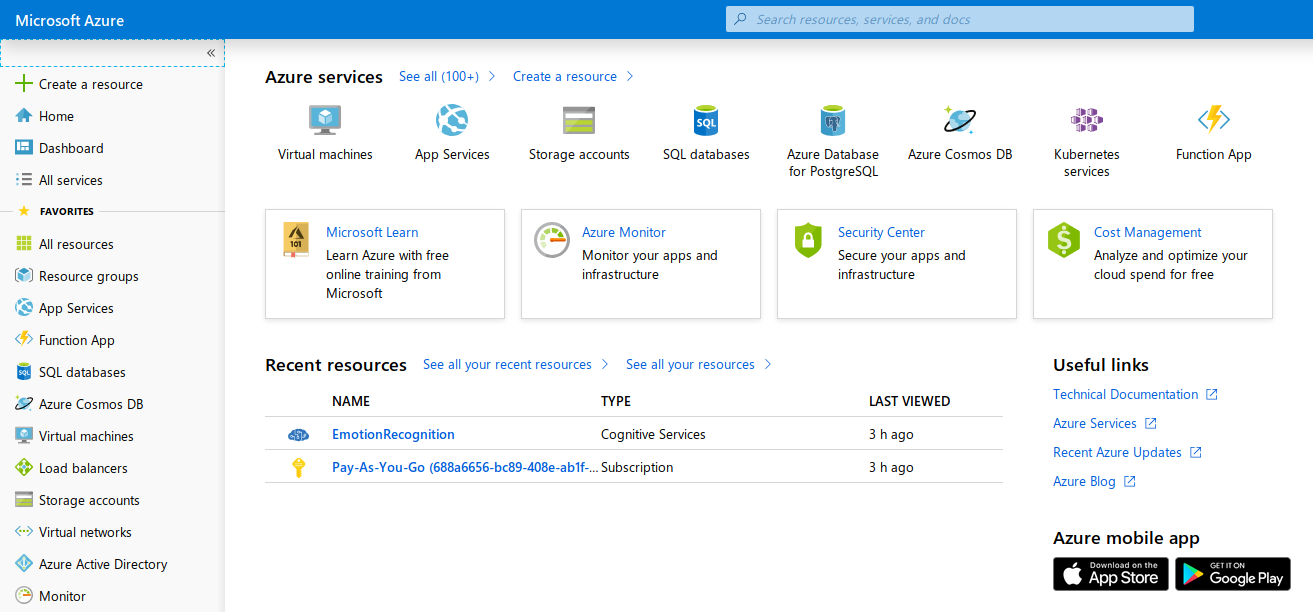
The first step is to create an account with the Microsoft Azure to be able to obtain a subscription key which is needed to connect to the api in the first place. The account itself is free you are provided with free access to the most popular products for 12 months, and access to 25 various products which are free indefinitely. Included in the ‘always free’ category is the face API, as long as you don’t go over 20 requests a minute or 30,000 transactions a month; which would be fairly difficult! Once you have created your account, head to the portal and click 'Create a Resource' on the left hand side.
Upon clicking this, a menu will be revealed with a list of services and APIs you can access. For the purposes of this project we will be working with the face API. To access this, click on the 'AI + Machine Learning' sub menu, and then on 'Face'.

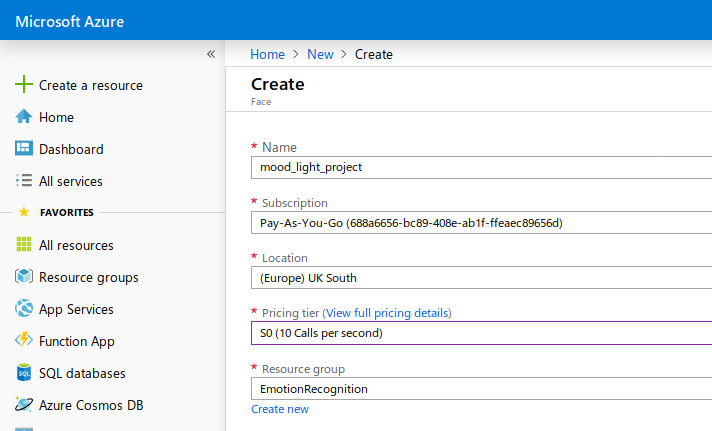
The next page will require you to enter some details, mainly for your convenience, such as a name for the resource, your location, and also the subscription plan you are using. I entered 'Emotion Recognition' for the name. For the subscription plan, you should have 'f0' available, which will allow you to use this for free as long as you don't go over the limits specified above. The screenshot below shows 's0' but this is simply because I already have the resource created and you cannot create more than one free resource for the same API!
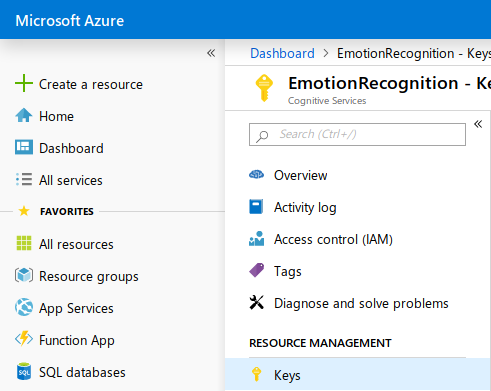
Once this has been created you will be able to access your API keys and endpoint URL! If you go to the dashboard, you will see your newly created resource with the name you specified. Click on this and you will gain access to the information on that resource. To access th endpoint URL for your location, click on overview and you will see it in the right hand column. Keep hold of this as you will need to enter it in the code below! The final piece of information you need to proceed is the API key for this service. Simply click on keys and you will be brought to them! Again, keep hold of one of your keys (you are given two) as you will also need to enter this in the code below! Now you are all set up with Azure and ready to proceed!
Connecting to the Azure API with Python and Returning Emotions from Pictures...
As mentioned previously, Microsoft's documentation for the API is quite detailed and they provide a good amount of introductory code to connect to the API. If you click here we are introduced to a quickstart page for detecting faces and facial features with the API. Scroll down and we will see some sample code, which can be ran and experimented with following the steps below:
- Copy the code below these steps into a text editor or IDE of your choice.
- Make the following changes in code where needed:
- Replace the value of subscription_key with your subscription key.
- Replace the value of face_api_url with the endpoint URL for the Face API resource in the Azure region where you obtained your subscription keys, if necessary.
- Optionally, replace the value of image_url with the URL of a different image that you want to analyze.
- Save the code as a file with an .py extension. For example, detect-face.py.
- Open a command prompt window.
- At the prompt, use the python command to run the sample. For example, python detect-face.py.
                        # Import requests library.
                        import requests

                        # Specify your subscription key here.
                        subscription_key = None
                        assert subscription_key

                        # The endpoint from where you are getting the API key.
                        # This is specified on overview page on the Azure dashboard.
                        face_api_url = ''

                        image_url = 'https://upload.wikimedia.org/wikipedia/commons/3/37/Dagestani_man_and_woman.jpg'

                        headers = { 'Ocp-Apim-Subscription-Key': subscription_key }

                        params = {
                            'returnFaceId': 'true',
                            'returnFaceLandmarks': 'false',
                            'returnFaceAttributes': 'age,gender,headPose,smile,facialHair,glasses,emotion,hair,makeup,occlusion,accessories,blur,exposure,noise',
                        }

                        response = requests.post(face_api_url, params=params, headers=headers, json={"url": image_url})
                        print(json.dumps(response.json()))
Returned will be a JSON dictionary which contains a large amount of features that the Azure AI will have extracted from the image. Around the 4th item in the dictionary will be the list of emotions and the confidence level of each. You are able to specify the image you want to upload by changing the string in the ‘image_url’ variable to a direct image URL of your choice.
As I am just interested in the emotion for the purposes of this project, it would be wise to cut out all the other unnecessary data that is returned by the API. This can be achieved by changing what is specified in the ‘returnFaceAttributes’ parameter. Currently, all the potential features are included however we can remove anything but emotion and, as expected, just the confidence levels for each emotion will be returned!
Getting the 'Most Confident' Emotion...
Due to how I would like this mood light to work, it is vital I access the emotion with the highest confidence level so I can then utilise this in order to change the colour of the RGB LED depending on the emotion. This is a relatively simple task which utilises for loops. The first addition we need to make is returning the response as a JSON dictionary. Next, we loop through the dictionary and compare the confidence levels to one another, the highest will be determined and the corresponding emotion will be stored in a variable. We are then able to use this to decide which colour we want the RGB LED to be later on in the project! Add the code below to the bottom of what you already have - it might be a good idea to remove the print statement from the bottom of the above code, just to reduce confusion!
                        # Setting initial variables, place below imports at top.
                        strongest_emotion = ''
                        largest_number = 0

                        # Converting the reponse to a JSON dict.
                        response = reponse.json()
                        # Setting the response to the face attributes part of the dict.
                        response = reponse[0]['faceAttributes']

                        # Loop through the emotions returned and check the confidence level.
                        # The emotion that corresponds to the highest confidence level will be set to the strongest_emotion variable.
                        for k in reponse:
                            if reponse[k] > largest_number:
                                strongest_emotion = k
Uploading a Local Image to the API...
So far, I have shown how we can change the image_url in the code above to an image of our choice. However, this would mean each time we want to test an image of our own we would have to upload our image somewhere online, which would prove to be quite a tedious task. Also, you may not want to be constantly uploading images of yourself or people you know to public hosts! With a couple of changes to the code, we are able to start specifying images from our local disk which will be automatically uploaded directly to the API, removing the need for a third part image host.
The first change that needs to be made is that we actually need to specify the path of the image and save the binary data to a variable. To do this, save the path of the image to a variable name of your choice such as 'image_path'. Please note that the full path needs to be specified in order for this to work properly! The next step is to open the data with the 'open()' function. Finally, once the file is opended we save the file to a variable name of your choice such as 'image_data'.
The next change we need to make is within the headers. The content type of the file we are uploading needs to be specified, in this case we add 'Content-Type': 'application/octet-stream'. Finally, a parameter needs to be changed in our request. We can remove the 'json={"url": image_url}' part as we are no longer use this. In its place we put 'data=' and the name of the variable which you saved the image to, in my case it would be 'image_data'. That's it! The full code so far is shown below, just to remove any confusion. I have also added a print statement to the bottom just so the strongest emotion can be returned!
                        # Import requests library.
                        import requests

                        # Setting initial variables for strongest emotion and highest confidence level.
                        strongest_emotion = ''
                        largest_number = 0

                        # Specify your subscription key here.
                        subscription_key = None
                        assert subscription_key

                        # The endpoint from where you are getting the API key.
                        # This is specified on overview page on the Azure dashboard.
                        face_api_url = 'https://westcentralus.api.cognitive.microsoft.com/face/v1.0/detect'

                        # Specify the full path to your local image.
                        image_path = ''

                        # Open the image and store the data in a variable.
                        with open(image_path, 'rb') as f:
                            image_data = f.read()

                        # Set headers.
                        headers = { 'Ocp-Apim-Subscription-Key': subscription_key }

                        # Set params, i.e. what do you want to be returned. In this case we just want the emotion confidence levels.
                        params = {
                            'returnFaceAttributes': 'emotion',
                        }

                        # Calling the API with what is defined above and storing the response.
                        response = requests.post(face_api_url, params=params, headers=headers, data=image_data)
                        # Converting the reponse to a JSON dict.
                        response = reponse.json()
                        # Setting the response to the face attributes part of the dict.
                        response = reponse[0]['faceAttributes']

                        # Loop through the emotions returned and check the confidence level.
                        # The emotion that corresponds to the highest confidence level will be set to the strongest_emotion variable.
                        for k in reponse:
                            if reponse[k] > largest_number:
                                strongest_emotion = k

                        # Printing the strongest emotion as returned from the API.
                        print(strongest_emotion)
Conclusion...
This condludes the first part of the mood light project. I have introduced the basics of the Azure API and how to get the emotions from faces from both pictures online and from your local directory. This use of the API and the code implemented will be the backbone of the mood light. The API will do all the heavy lifting, meaning that the mood light circuit itself will be very simple! The hardest part is completed, in the next blog I will be showing how to interact with the RGB LED with Python.
References...
Azure.microsoft.com. (n.d.). Face API - Facial Recognition Software | Microsoft Azure. [online] Available at: https://azure.microsoft.com/en-us/services/cognitive-services/face/ [Accessed 14 April 2019].